
Panduan Lengkap Install & Konfigurasi Ceph 3 Node dengan RGW (S3 Compatible)

Ceph adalah platform penyimpanan terdistribusi yang powerful untuk block, file, dan object storage. Artikel ini membahas cara install Ceph di Ubuntu 24.04 dengan 3 node cluster lengkap dengan konfigurasi RGW (RADOS Gateway) agar bisa digunakan sebagai S3-compatible storage. ✨
🔧 1. Persiapan Awal (Jalankan di semua node: ceph-1, ceph-2, ceph-3)
sudo apt update && sudo apt -y upgrade
sudo apt -y install curl jq lvm2 chrony podman openssh-server ceph-common

# aktifkan sinkron waktu
sudo systemctl enable --now chrony
📌 Mapping host (jalankan di SEMUA node)
Tambahkan ke /etc/hosts:
cat <<'EOF' | sudo tee -a /etc/hosts
103.168.146.210 ceph-1
103.168.146.206 ceph-2
103.168.146.207 ceph-3
EOF
🖥️ Set hostname unik (jalankan sesuai node)
# di ceph-1
sudo hostnamectl set-hostname ceph-1
# di ceph-2
sudo hostnamectl set-hostname ceph-2
# di ceph-3
sudo hostnamectl set-hostname ceph-3
⚠️ Pastikan ada disk kosong untuk OSD (mis. /dev/vdb). Jangan pakai disk OS (/dev/vda).
🔥 Jika firewall UFW aktif, buka port Ceph
sudo ufw allow 22/tcp
sudo ufw allow 3300,6789/tcp
sudo ufw allow 6800:7300/tcp
sudo ufw reload
🚀 2. Install Cephadm & Bootstrap Cluster
# Di ceph-1, ceph-2, ceph-3
apt -y install cephadm || true

# Tarik image Ceph versi stabil (v19.2.3) hanya di ceph-1
podman pull quay.io/ceph/ceph:v19.2.3 || podman pull docker.io/ceph/ceph:v19.2.3

# Bootstrap Cluster (HANYA di ceph-1)
cephadm --image quay.io/ceph/ceph:v19.2.3 bootstrap \
  --mon-ip 103.168.146.210 \
  --ssh-user root \
  --initial-dashboard-user root \
  --initial-dashboard-password 'Masdika@2025'
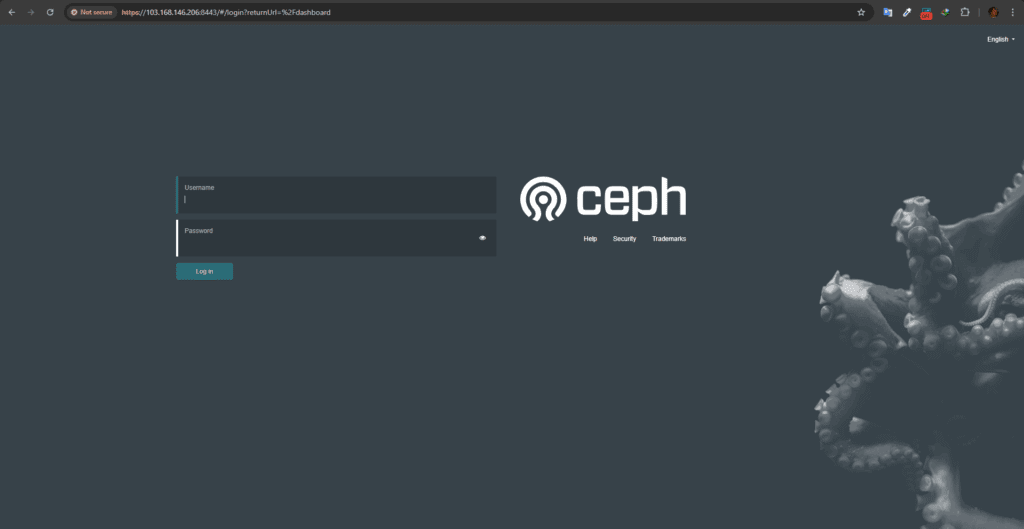
Dashboard bisa diakses di: 👉 https://103.168.146.210:8443
🔑 3. Tambahkan Node ke Cluster
# sebar key ke node lain
ceph cephadm get-pub-key > /root/ceph.pub
ssh-copy-id -f -i /root/ceph.pub root@103.168.146.206
ssh-copy-id -f -i /root/ceph.pub root@103.168.146.207
# daftarkan host
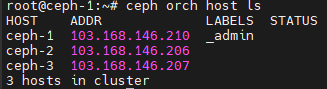
ceph orch host add ceph-2 103.168.146.206
ceph orch host add ceph-3 103.168.146.207
ceph orch host ls
🗄️ 4. Deploy MON, MGR, dan OSD
MON & MGR
# sebar MON & MGR
ceph orch apply mon --placement="ceph-1,ceph-2,ceph-3"
ceph orch apply mgr --placement="count:2"
OSD
# cek disk kosong
ceph orch device ls

# jadikan semua disk kosong sebagai OSD
ceph orch daemon add osd ceph-1:/dev/vdb
ceph orch daemon add osd ceph-2:/dev/vdb
ceph orch daemon add osd ceph-3:/dev/vdb
Cek status:
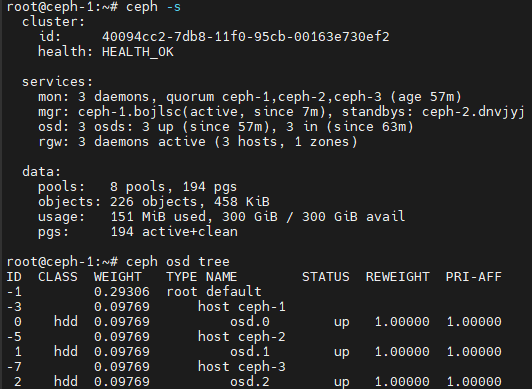
ceph -s
ceph osd tree
Harus muncul 3 OSD UP+IN.
☁️ 5. Setup RGW (Rados Gateway) di 3 Node
Agar Ceph bisa digunakan sebagai S3-compatible object storage, kita setup RGW di semua node.
5.1 Buat Realm & Zone (hanya sekali di ceph-1)
# Realm 'default'
radosgw-admin realm create --rgw-realm=default --default

# Zonegroup 'default'
radosgw-admin zonegroup create --rgw-zonegroup=default --master --default

# Zone 'default'
radosgw-admin zone create --rgw-zonegroup=default --rgw-zone=default --master --default

# Commit konfigurasi
radosgw-admin period update --commit
5.2 Deploy RGW ke semua node
# pasang rgw service "default.default" di semua node
ceph orch apply rgw default.default --placement="ceph-1,ceph-2,ceph-3"
Cek status:
ceph orch ps --daemon_type rgw
Harus muncul 3 RGW (1 per node).

🌐 6. Setup HAProxy untuk Endpoint Tunggal
Install HAProxy (di node ceph-1 atau server terpisah):
sudo apt install -y haproxy
Edit /etc/haproxy/haproxy.cfg tambahkan:
frontend rgw_frontend
    bind *:7480
    mode http
    default_backend rgw_backend

backend rgw_backend
    mode http
    balance roundrobin
    option httpchk GET /
    server ceph-1 103.168.146.210:80 check
    server ceph-2 103.168.146.206:80 check
    server ceph-3 103.168.146.207:80 check
Restart HAProxy:
sudo systemctl restart haproxy
sudo systemctl enable haproxy
Sekarang endpoint tunggal tersedia di: 👉 http://103.168.146.210:7480
🔑 7. Buat User S3
radosgw-admin user create --uid="andika" --display-name="Andika"
Catat access_key dan secret_key dari output.
📦 8. Konfigurasi AWS CLI & Test
Install AWS CLI:
curl "https://awscli.amazonaws.com/awscli-exe-linux-x86_64.zip" -o "awscliv2.zip"
unzip awscliv2.zip
sudo ./aws/install
Configure:
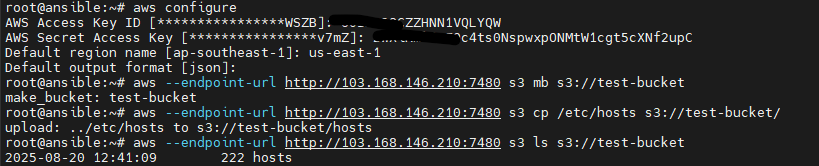
aws configure
# Access Key ID: isi dari radosgw-admin
# Secret Access Key: isi dari radosgw-admin
# Default region: us-east-1
# Output format: json
Tes operasi bucket:
# Buat bucket baru
aws --endpoint-url http://103.168.146.210:7480 s3 mb s3://test-bucket

# Upload file
aws --endpoint-url http://103.168.146.210:7480 s3 cp /etc/hosts s3://test-bucket/

# List isi bucket
aws --endpoint-url http://103.168.146.210:7480 s3 ls s3://test-bucket
🎯 Kesimpulan
Dengan langkah di atas:
- ✅ Cluster Ceph 3-node berjalan stabil (MON quorum, MGR standby, OSD aktif).
- ✅ RGW aktif di 3 node → HA & siap pakai sebagai S3-compatible storage.
- ✅ HAProxy membuat 1 endpoint tunggal (
http://<ip>:7480). - ✅ AWS CLI berhasil membuat bucket & upload object.
🔥 Kini kamu punya object storage setara S3, tapi di-host di cluster Ceph milikmu sendiri!